 For this reflection, I would like you to post a nicely cropped (and well lit) photo of your work to your blog. You will then need to create an artist's statement to accompany your painting in the final year end art show.
I will copy your artist's statement from your blog post, and print it out to hang with your work on the wall. Please include the following: 1)Artist's Name (include first and last): 2)Title of work: (Give your piece a name) 3) A 4-6 sentence PARAGRAPH that explains your work. Choose a minimum of 3 of the following questions to address in this paragraph: - What inspired you to create this piece? -What is the meaning behind your work? -Does your artwork promote change? If so, how? -Describe what you would like the viewer to understand in your piece? -Was there an artist that inspired you? How and why were you inspired by this artist? -Did you incorporate some of the elements of design in an intentional way? Explain why you used them the way you did (elements: Line, shape, colour, value, form, texture, space) -
0 Comments
 Here is a link to the Project Proposal Sheet I gave you in class. Please complete this with careful thought, and make sure you run your ideas by me before starting. I will let you know what supplies I can provide, and what you will need to bring in.
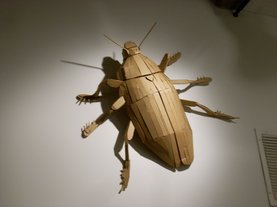
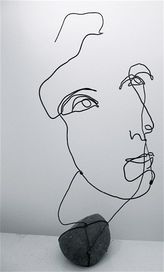 Create a new blog post, posting an image of each of your sculpture challenges. By the end of the next two weeks, you should have a photo example posted of 5 different sculptural techniques (cardboard sculpture, wire sculpture, packing tape sculpture, soft sculpture, and found object sculpture).
Respond to the following prompts: The Sculptural medium I enjoyed the most was...... because..... The medium I found the most challenging was...... because....... In this 3D unit, I am hoping to learn..... By the end of this unit, I would like to be able to ......  If you missed today's class, I introduced our new painting project. Below you will find the three clips we watched in class, showing artists bringing global awareness to causes that are important to them. Favianna Rodriguez: https://www.youtube.com/watch?v=9mSZV-6CwWI&feature=youtu.be JR: http://www.jr-art.net/videos/face-2-face JR's project that was inspired by his initial face-2-face initiative: https://www.ted.com/talks/jr_one_year_of_turning_the_world_inside_out#t-364671
Please Review the following power point. We will be completing a Colour Wheel and Value Scale in your sketchbook based on the colour theory discussed in the power point.
The Colour Wheel Exercise: Either using a template provided by Ms. Spencer (extras are in the Art 8 'Extra Handouts' folder at the back of the room), or creating your own unique circle in your sketchbook, you must create an accurate Colour Wheel using colours found in magazines (a colour wheel collage). Your Colour Wheel will be marked on colour accuracy, neatness, and whether or not your labels (names of each hue) are accurate. See the wheel at the front of the room on the 'Colour poster' for hue names if you've forgotten. 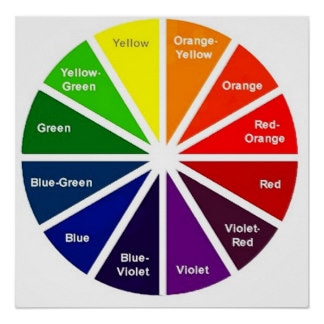 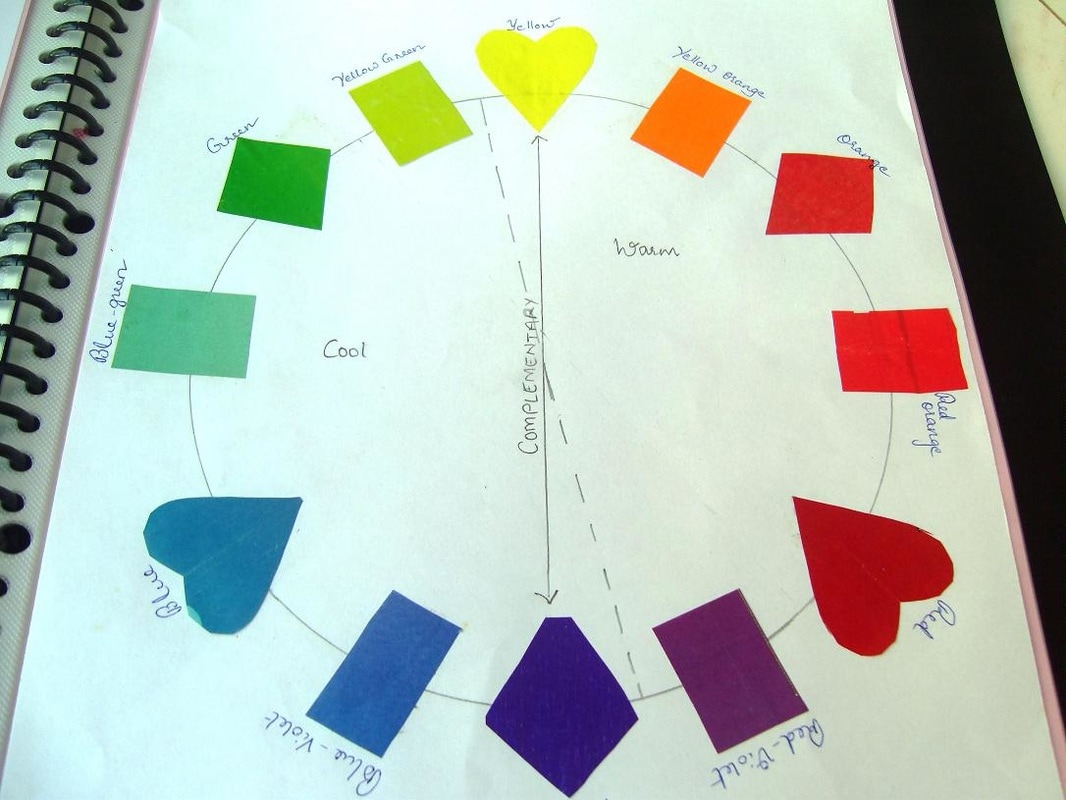 The Value Scale Exercise: Using the 'Colour Value Scales' handout to complete 6 value scales of the primary and secondary hues. The starting hue should go in the middle, with the tints to the left, and shades to the right. When you are creating a tint of a hue, gradually add white. When you are creating a shade, you will need to slowly add black (a tiny bit at a time), or the complementary colour. For example, when attempting to make a shade of red, add black, or a little bit of green. 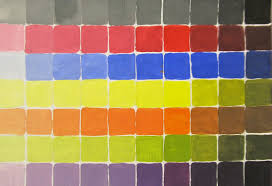 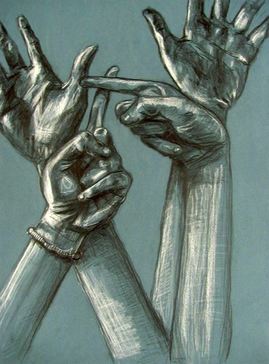 Your FIRST REFLECTION....
For your first reflection, I would like you to tell me a bit about your planning process for your layered composition. You must include at least 3 photos in this post. At least 1 photo must be of your work in progress (this might include your sketchbook experimentation, or thumbnail sketches of your work in its early stages, or your image at whatever stage it's at today). Another photo might be of other artists work that was inspiring to you (maybe from your pinterest board). Please make an honest attempt at giving credit to the original artist, should you choose to post someone else's work- Please use the following questions to create a thoughtful reflection (in sentences form) of your artistic process. 1) INSPIRATION: What artists, or pieces of work were you inspired by? Post at least one example, and explain in detail what you liked about it. 2) MEDIUM: What mediums did you choose to work with? Have you used these mediums before? Did you watch any tutorials? Were they helpful? What do you hope to learn over the duration of this project? Have you taken any creative risks with this piece? 3) COMPOSITION: Overall, compositionally, what do you hope to achieve? Think about the elements and principals of design that might be relevant to your piece, and tell me how they might be involved in your portrait (elements: Line, shape, space, form, colour, value, texture / Principles: Balance, Movement, Pattern, Contrast, Rhythm, Emphasis, Unity). As an example, will you work within a specific colour scheme? 4) FINAL THOUGHTS: What are you excited about? What are you nervous / worried about? Keep in mind, your plan might change as you begin to work. FOR AN UNDERSTANDING OF HOW YOUR REFLECTION WILL BE MARKED, CLICK HERE. Steps:
1. PROJECT RESEARCH: -explore Ms. Spencer's Pinterest board for this project 'The Layered Life' - Create a pinterest board of layered examples as well as other images that incorporate your chosen medium, & other artists that inspire you, maybe through their approach, subject matter, or techniques that interest you (MINIMUM 20 PINS) 2. PRACTICE and DESIGN: Bring in your chosen objects in order to get familiar with them. Practice your observational drawings of your subject (How will you make this piece engaging / meaningful to you?) -Experiment with different view points and angles (perhaps using a viewfinder will help you with this) -Complete at least 4 quick sketches getting familiar with your object from different angles and perspectives (1 Day) 3. EXPERIMENT & PLAY: Choose one of your thumbnail sketches, enlarge it in your sketchbook, and experiment with your chosen drawing medium (1 Day) -Remember your pinterest board is a great place to pin technique tutorials if there is a particular approach or medium that you are unsure of, or that was not covered in class -I will do mini bootcamps using prismacolours, washable markers, watercolour pencil crayons, wax, masking fluid, chalk pastel, charcoal, but there may be other materials you wish to try 4. Prepare your paper and start your final piece (2-2.5 Days) -Do you need to prep your paper first (tape edges? add a stain etc. before drawing?) -After your paper is ready, start with the front layer and draw your object multiple times from various angles -Underlap, underlap, underlap -Will you add a third under layer with a silhouette? -Start to play with medium (How will you show highlights and shadows?) FINAL DAY: Critique Game and Blog Post Reflection 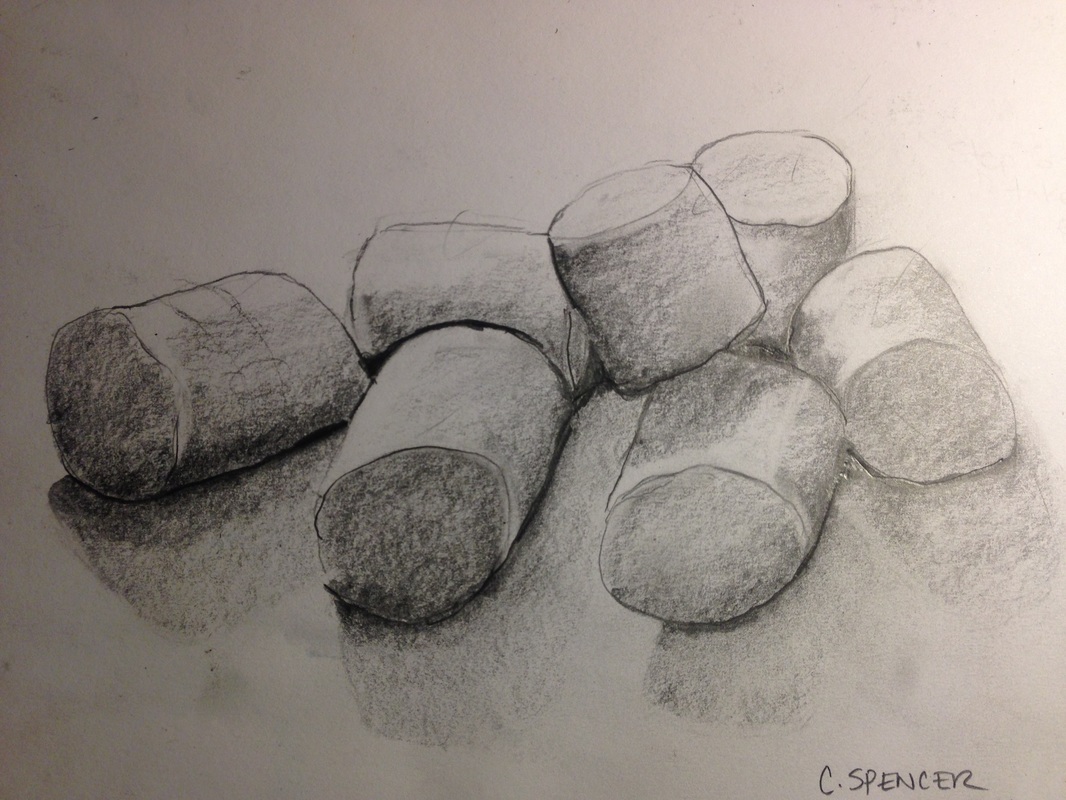 If you missed this lesson, you can find the step by step instructions HERE.
We will be using two classes to complete this drawing. Now it is time to use Value to achieve form. We are now trying to our knowledge of lights and darks to make object that we draw, appear 3 Dimensional. In your sketchbook, draw a Cone, Sphere, Box, and Cyllinder. Use your knowledge of Value make the four objects appear 3d. If you are confused, there is a worksheet in the 'Art 8 Extra Handouts folder' in the classroom, that will walk you through the stages of shading. As bonus exercise, try the four shapes again using another type of shading. 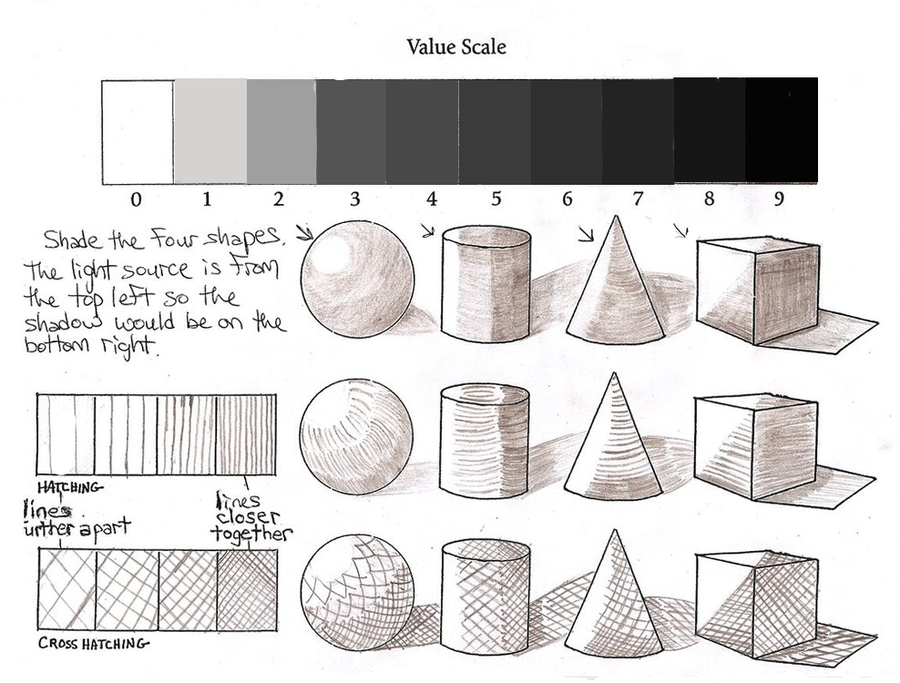 Here are some of the thing we covered in our Value lesson... 1) PENCILS EXPLAINED: While you were away, we examined the properties of a drawing pencil, and discussed the differences between the various pencils (2H vs. 2B etc). Click here for an explanation. 2) VALUE: Next we used our drawing pencils to create a full range of value. We started by creating a 7 square Value scale in our sketchbook. -Using a ruler and a 2B pencil, please create a 7 square Value scale in your own sketchbook similar to the one below 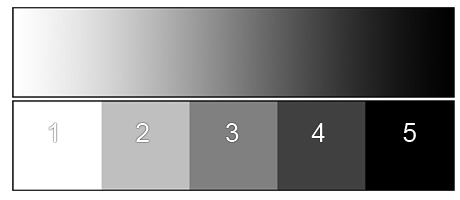 -When you have finished, complete a second 7 square Value Scale and use any of the other shading techniques talked about on the handout (hatching, cross-hatching, stippling, etc.) Some examples are below: 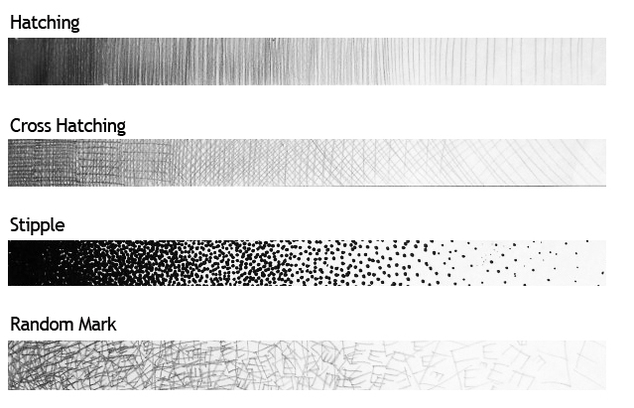 |
Art Students...Here you will find assignments, links, and instructions for Ms. Spencer's Art 8 classes Archives
April 2017
Categories |
||||||
 RSS Feed
