 If you missed this lesson, you can find the step by step instructions HERE.
We will be using two classes to complete this drawing.
0 Comments
Now it is time to use Value to achieve form. We are now trying to our knowledge of lights and darks to make object that we draw, appear 3 Dimensional. In your sketchbook, draw a Cone, Sphere, Box, and Cyllinder. Use your knowledge of Value make the four objects appear 3d. If you are confused, there is a worksheet in the 'Art 8 Extra Handouts folder' in the classroom, that will walk you through the stages of shading. As bonus exercise, try the four shapes again using another type of shading. 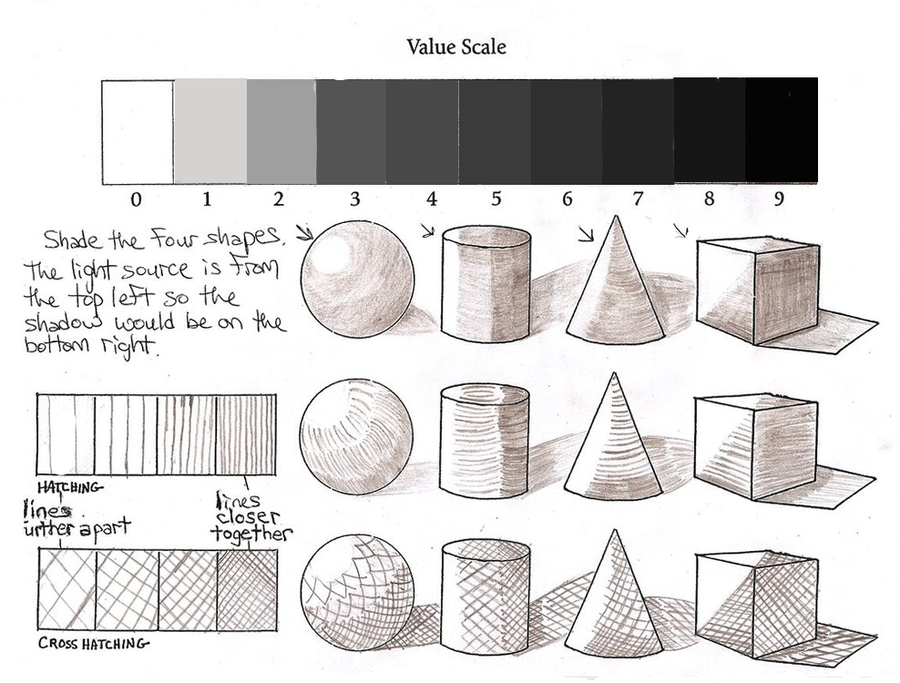 Here are some of the thing we covered in our Value lesson... 1) PENCILS EXPLAINED: While you were away, we examined the properties of a drawing pencil, and discussed the differences between the various pencils (2H vs. 2B etc). Click here for an explanation. 2) VALUE: Next we used our drawing pencils to create a full range of value. We started by creating a 7 square Value scale in our sketchbook. -Using a ruler and a 2B pencil, please create a 7 square Value scale in your own sketchbook similar to the one below 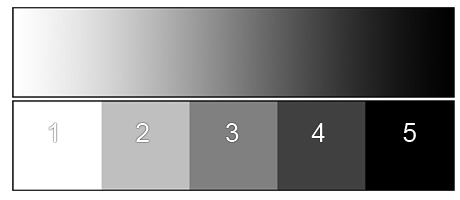 -When you have finished, complete a second 7 square Value Scale and use any of the other shading techniques talked about on the handout (hatching, cross-hatching, stippling, etc.) Some examples are below: 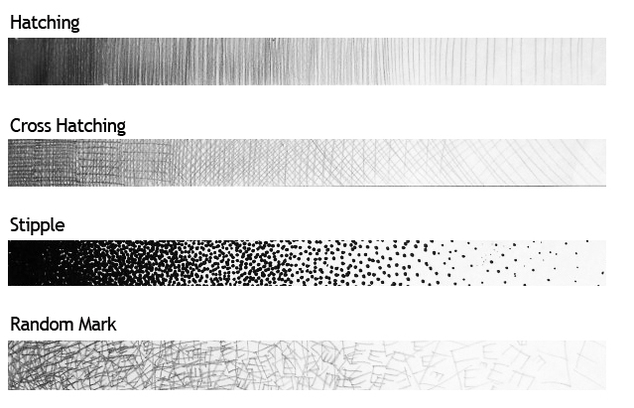 Below, I have posted a video that will the steps you need in order to create your Art website, using weebly. You will use this website (blog page) to document and reflect on your artistic process. You will find that weebly is VERY user friendly, and I promise, you will have little difficulty navigating this site.
For a step by step video that helps you create a weebly, click HERE. If you would like to use a format for your website URL, you can try this: firstnamelastname-cwood-yearyougraduate.weebly.com for example: courtenayspencer-cwood-2016.weebly.com If you would like to use a different URL, that is fine, just make sure you send the link to me in an email: [email protected] If you are simply adding an art 8 blog page, to a pre-existing URL (website) just email me the link to your site: [email protected] Remember: -choose your format so that it is user friendly (and your teacher can find your blog) -ideally your courses are at the top (ie. Art 8) with drop-down menus popping out from them when you hover the mouse over ('Art 8 blog', and 'projects') -start by adding a standard page and title it 'Art 8', then add a blog page and call it 'Art 8 Blog' then add another standard page and title it 'projects' - 'Art 8' should be at the top with the 'Art 8 blog' and 'project' page in the drop-down menu, you can achieve this by clicking 'pages' and just making sure they stack below each other and you drag them in slightly 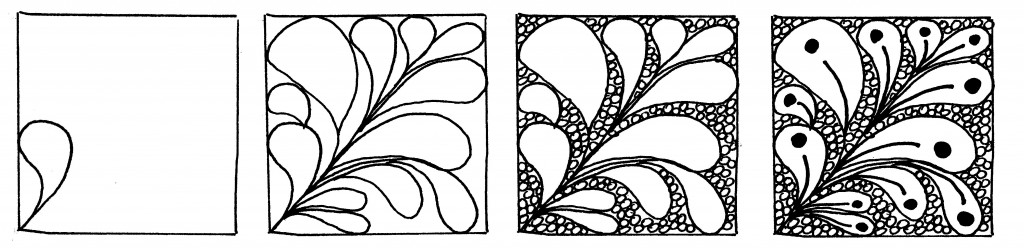 Today in class, I presented a lesson on creating 'Zentangles'.
For more information on how to create Zentagles, click HERE. For Zentangle templates, click HERE. You can also find examples of Zentangles on my Pinterest Page. HERE. Your assignment: 1) Practice, Practice, Practice. You must create three square Zentangles in your sketchbook. Draw the initial square, and the 'strings' using pencil, and then switch to a fineliner. Turn on your music, relax, and ENJOY! 2) Create a Zentangle Title Page -Page must include either your full first name, or initials (you decide) - Zentangles must be incorporated into the design in some way - Use the proper Zentangle process. You may only use a pencil to outline your drawing space, but as soon as you start to design the zentangles you must use a fineliner. How might you design your page? Feel free to use the internet to find images that inspire you. |
Art Students...Here you will find assignments, links, and instructions for Ms. Spencer's Art 8 classes Archives
April 2017
Categories |
 RSS Feed
