
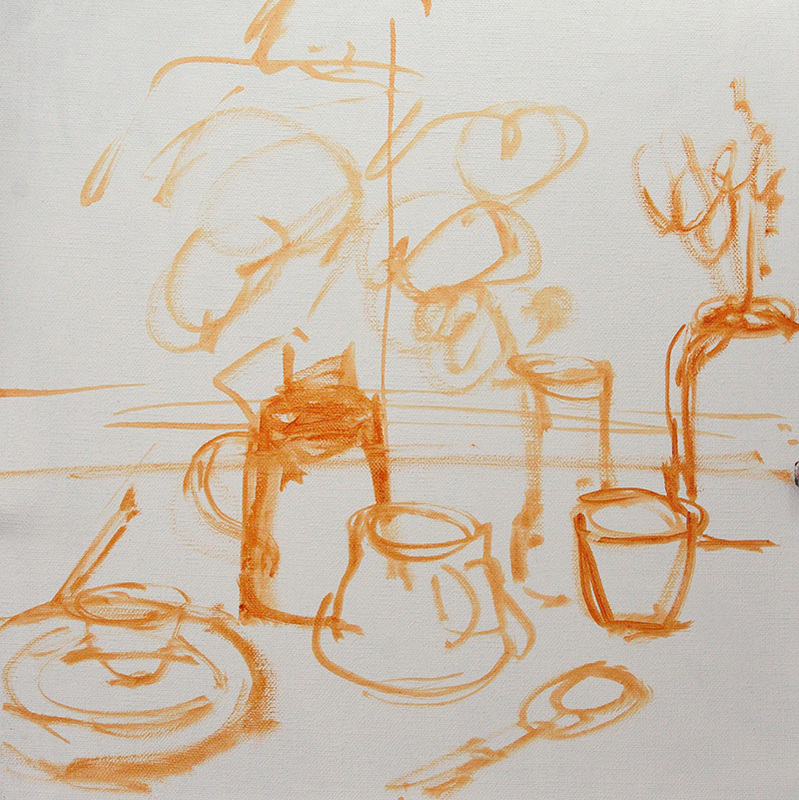
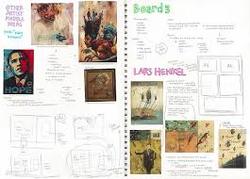
  In order to create a post on your weebly, you need to make sure you have accessed the Blog editor on the main weebly site and are not simply viewing your blog through its public URL. Once you have logged into weebly, clicked 'edit' and then clicked on your art blog page, click 'New Post' at the bottom of the page in order to begin your entry. Your FIRST REFLECTION.... For your first reflection, I would like you tell me a bit about the planning process of your 'Personal Still LIfe'. You must include at least 3 photos in this post. At least 1 photo must be of your work in progress (this might include your sketchbook experimentation, or thumbnail sketches, or your work in its early stages). -if you are photographing your work, think about how you might obtain a quality photo. Make sure your lighting is good, and your picture is focused Please use the following writing prompts to create a thoughtful reflection (in sentences form) of your artistic process. 1) SUBJECT: What subject matter did you choose to depict (what is your Still Life of??), and why is it personally meaningful to you? 2) INSPIRATION: What pieces of work or artists were you inspired by? Post at least one example, and explain in detail what you liked about it 3) MEDIUM: What medium did you choose to work with? Have you used this medium before? What do you hope to learn over the duration of this project? Did you watch any tutorials? Were they helpful? 4) COMPOSITION: How will you compose your still life? Will you 'zoom' in, will you show multiple angles, or might it be more traditional? Will it be realistic? Will it be more abstract? Describe your thoughts in these early stages. Keep in mind, your plan might change as you begin to work. (If you have thumbnail sketches of your composition, you might show them here) FOR AN UNDERSTANDING OF HOW YOUR REFLECTION WILL BE MARKED, SEE BELOW
0 Comments
You will need to create a Marshmallow still life on one full page of your sketchbook. Steps: At home, dump some Marshmallows onto a white piece of paper, and grab a desk lamp to exaggerate the lights and darks (if you are unable to do this, pop into the Art studio, create the Still life and take a photo with your phone) 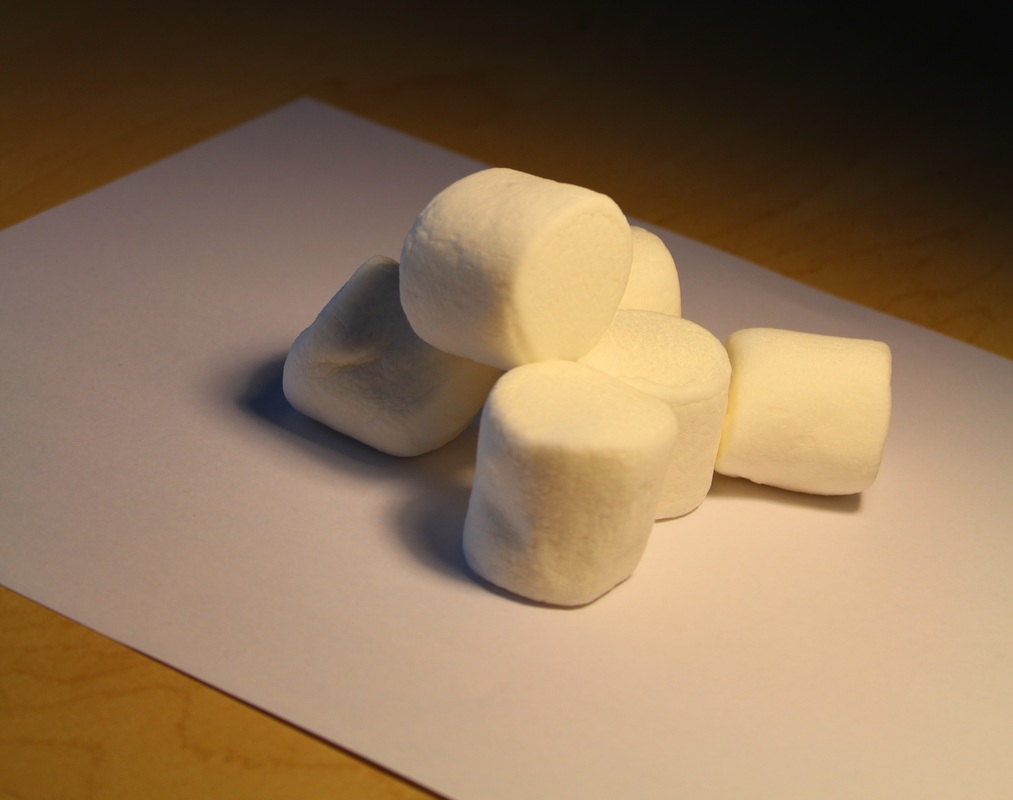 Time to begin.... 1) Start by drawing the contours of each marshmallow (keep in mind, the drawing below is NOT of the same pile pictured above. Sorry!!) 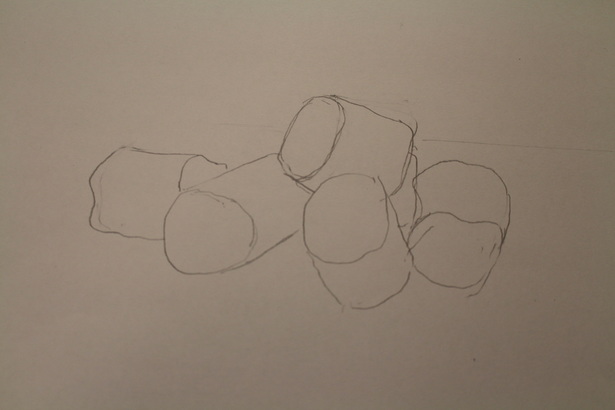 2) Using the side of your pencil, cover the dark portions of each marshmallow with a soft grey (aprox. box 2 on your value scale that we did last week) 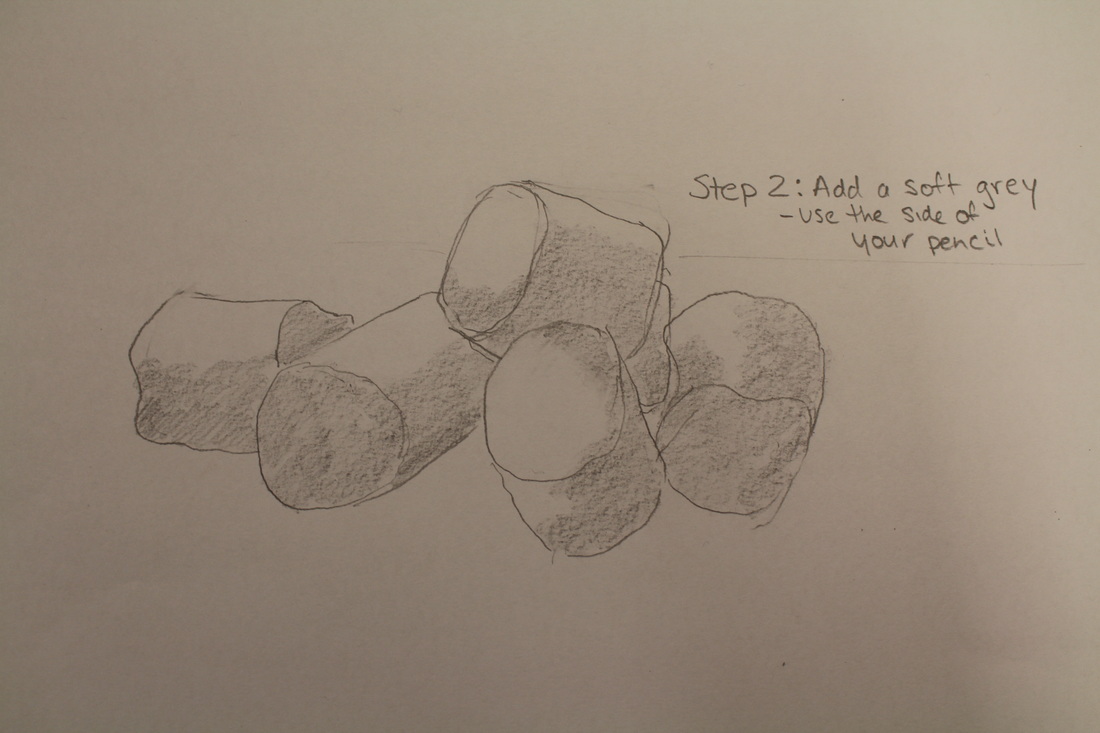 3) Now start to add a darker shadow in the darkest areas of each marshamallow. This darker shading should gently blend into the soft grey and then into white (like a value scale) 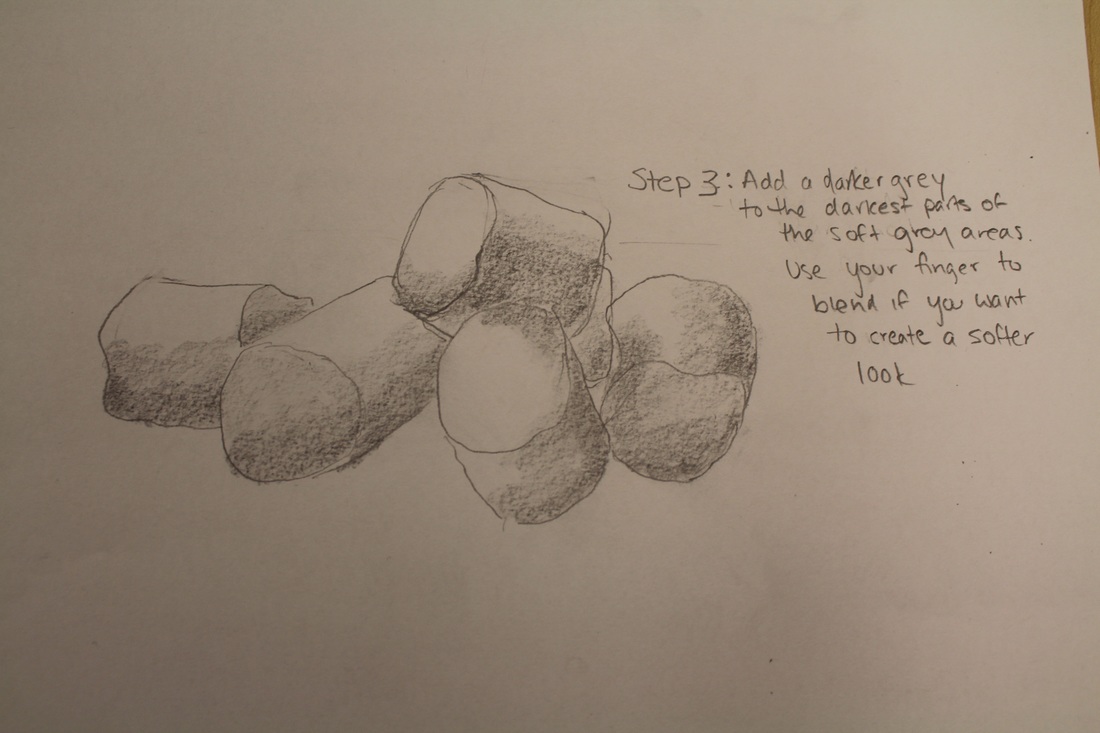 4) Next add the cast shadow (closely examine the shape of the shadow on each marshmallow). The Shadow should be darker at the base of each marshmallow 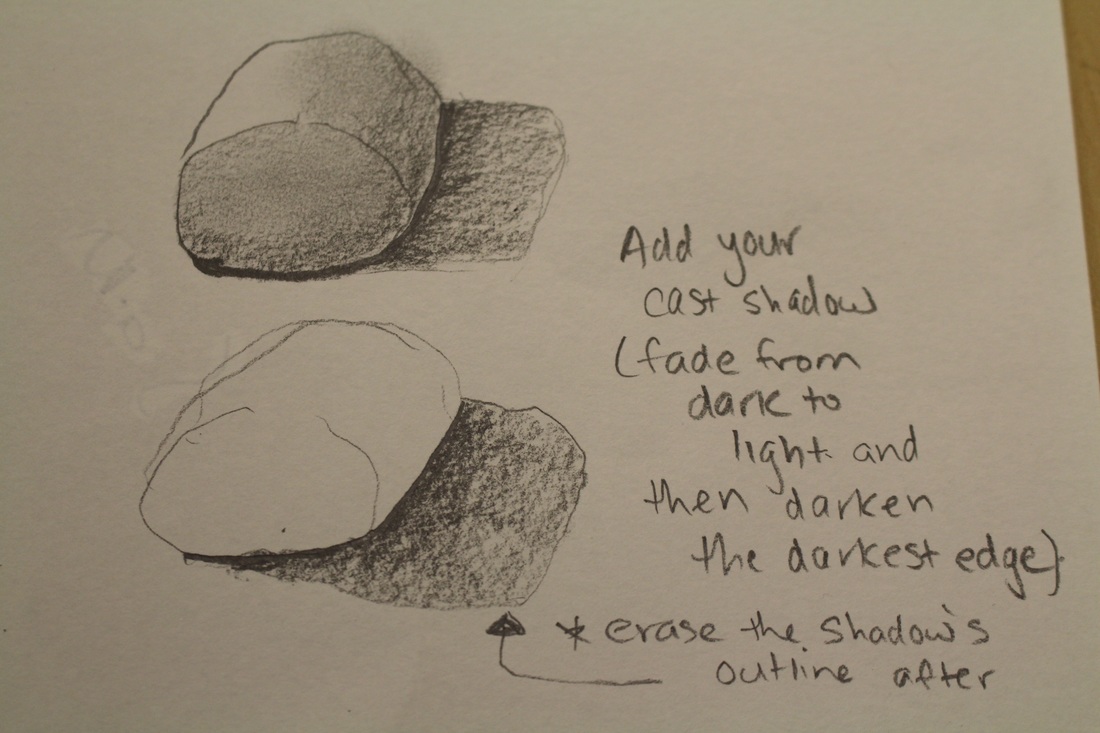 5) Now it's time to darken the 'inbetweens'. This makes the marshmallows pop off the page. Shade a dark value with the tip of your pencil wherever the marshmallow touches the ground, or in most cases another marshmallow. You can also darken the inbetween areas. Have a look at your composition. Can you see what I'm referring to? 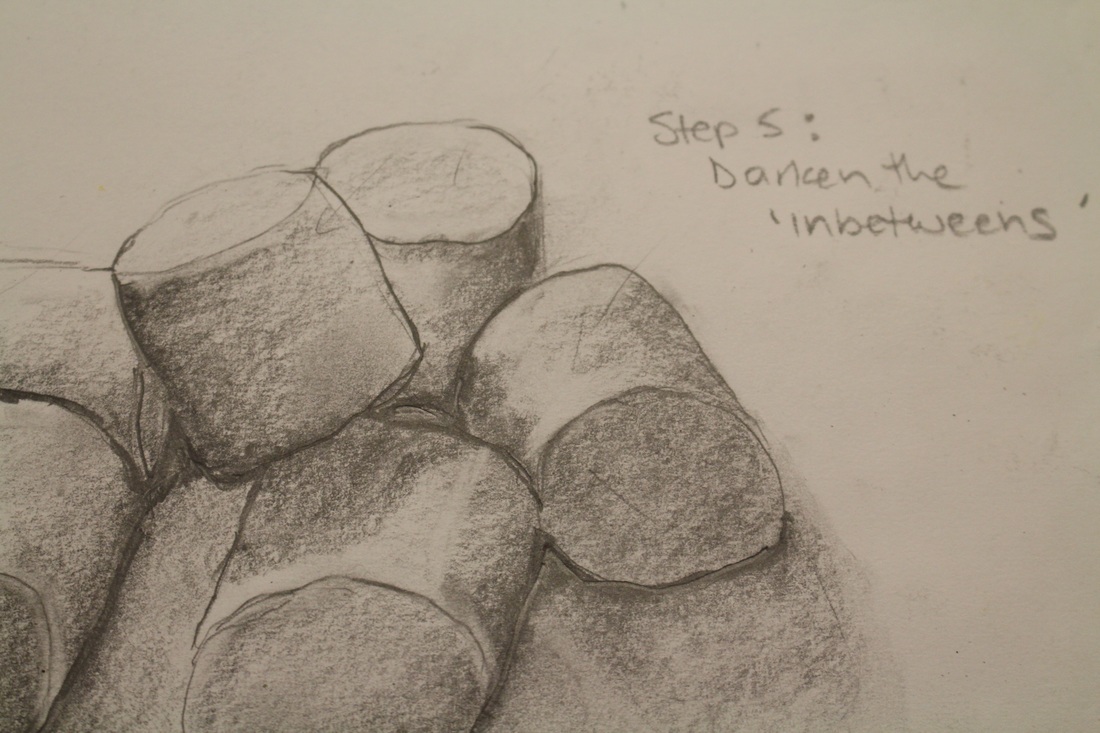 6) Lastly, it's time to tidy up your drawing. Make sure you've erased the outlines of the cast shadows (as shadows don't have outlines), you can also erase the obvious outline of each marshmallow, as marshmallows don't have outlines. You can smudge the marshmallows one by one, to make the colouring a little softer, but MAKE SURE that your last step is going in with the sharp part of an eraser to pull out any highlights that you may have lost when you began to smudge the image. Like adding darks, highlights also make the drawing 'pop'. Spray with fixative to prevent the graphite from moving. All done! Are you proud of your drawing? How does it look? 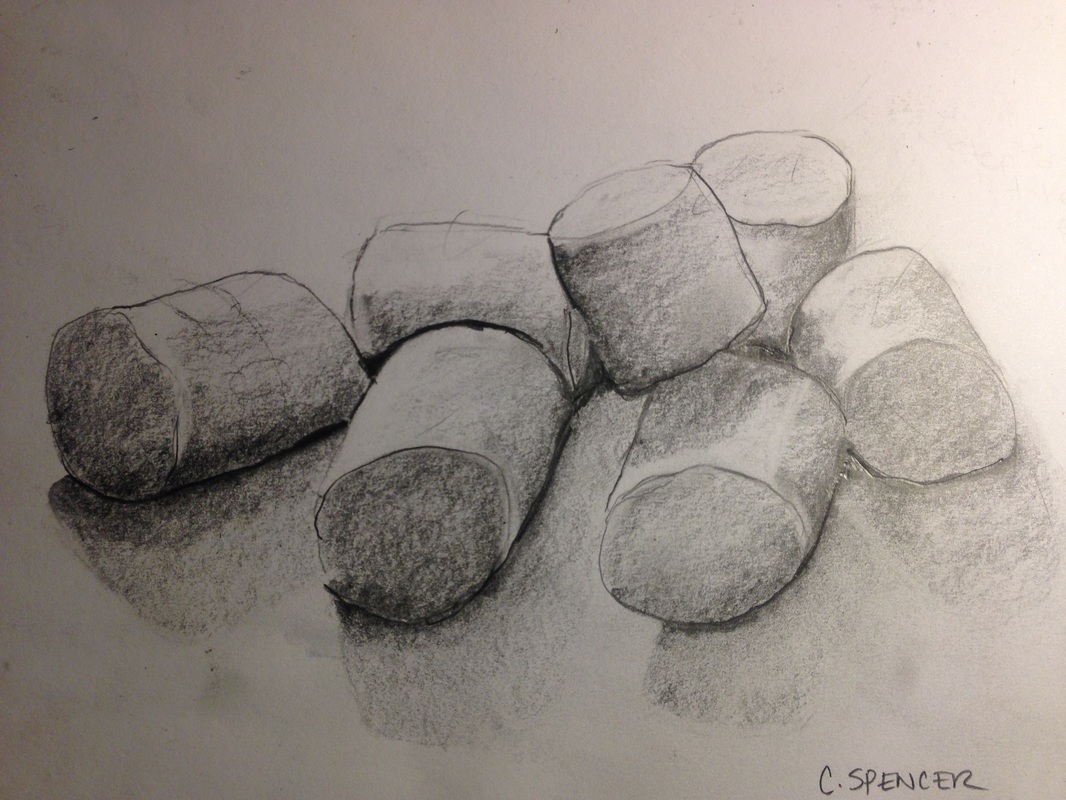 1) PENCILS EXPLAINED: While you were away, we examined the properties of a drawing pencil, and discussed the differences between the various pencils (2H vs. 2B etc). Click here for an explanation. 2) VALUE: Next we used our drawing pencils to create a full range of value. We started by creating a 5 square Value scale in our sketchbook. Using a ruler and a 2B pencil, please create a 5 square Value scale in your own sketchbook similar to the one below 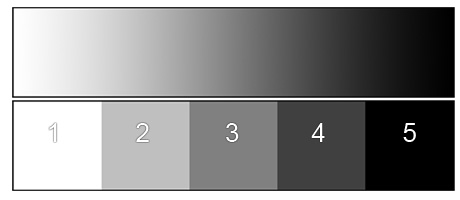 3) Next, we experimented with different types of shading, such as hatching, cross-hatching, or stipling. Please create a second value scale like the one above, but instead using a new type of shading.  4) Now it is time to use Value to achieve form. We are now trying to our knowledge of lights and darks to make object that we draw, appear 3 Dimensional. In your sketchbook, draw a Cone, Sphere, Box, and Cyllinder. Use your knowledge of Value make the four objects appear 3d. If you are confused, there is a worksheet in the 'Art 8 Extra Handouts folder' in the classroom, that will walk you through the stages of shading. As bonus exercise, try the four shapes again using another type of shading. 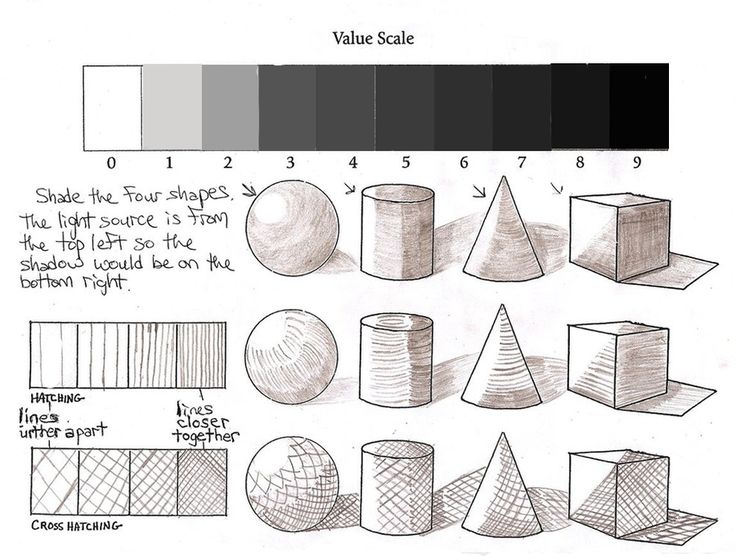 6) In our Final lesson of the week, we discussed Focal points. We also discussed how artists use view finders.
As this final assignment might be a little confusing if you weren't in class, please see me for a better explanation.
I hope you had a great time on Explore. We're excited to have you back! |
Art Students...Here you will find assignments, links, and instructions for Ms. Spencer's Art 8 classes Archives
April 2017
Categories |
||
 RSS Feed
