
 At this point you have finished (or are close to finishing) your Visual Journal on the theme of your choice. Before you consider it complete, make sure you have incorporated your chosen theme, and that the two page spread visually portrays this idea.
Blog Post Steps: 1) Take a photo of your Journal Page (make sure it is clear, cropped and well lit), and post it to a new blog post. Photos of your work should never be an after thought. Make sure they are planned and well executed. 2) Answer the following questions in your post: (cut and paste the questions into the body of your post, and answer below each one, so that you ensure you don't forget any questions) a) What materials did you experiment with for this journal page b) Did you discover anything new in experimenting with these materials? c) What is the theme of your visual Journal? If you chose from the '164' list, which idea were you inspired by? How did you portray this idea?
0 Comments
 Today in class, we discussed visual journaling as an art form. You were shown techniques, and various examples of these journals. I have put some links you may find helpful, on the resources page, and I'm sure you will find that there are countless sources of inspiration all over the internet, as visual journaling is taking the world by storm.
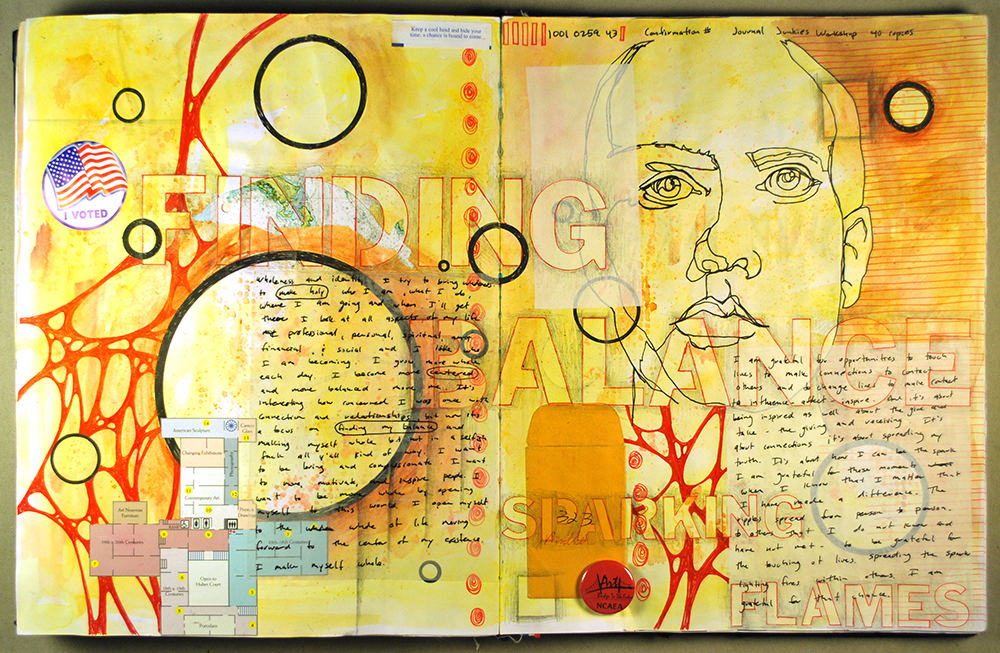
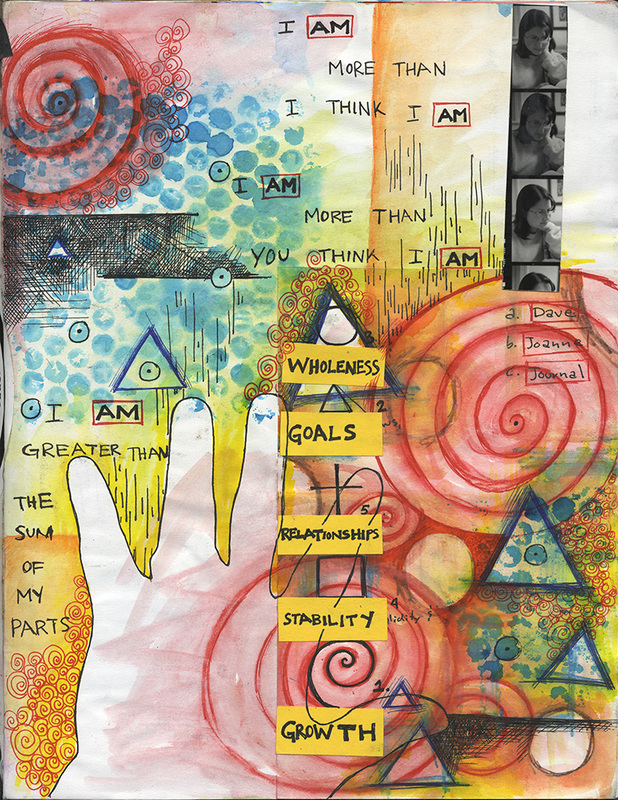
You have one week to create your first visual journal page. Steps to Creating your Visual Journal: 1) Start a Visual Journal Board on Pinterest (min 20 pins, and 5 must be from external sources) 2) Consult the document '165 Journal Assignments' (see Art 10E Resources), and choose a theme for your journal page 3) In your sketchbook create a 2 page visual journal entry (Due Tuesday Oct. 17th) Remember, the key to success with these journal pages is LAYER, LAYER, LAYER!!!  We are a few days into this current project, and I would like you tell me a bit about your artistic process so far. You must include at least 3 photos in this blog post. At least 1 photo must be of your work in progress (others might include, your paper staining experimentation, or thumbnail sketches of possible layouts, or your work in its early stages, or work that you found to be inspirational). -if you are photographing your work, think about how you might obtain a quality photo. Make sure your lighting is good, and your picture is focused Please use the following writing prompts to create a thoughtful reflection (Full Sentences, please). 1) SUBJECT: What did you choose to do your contour drawings of? Are you drawing from life, or from a photograph? 2) INSPIRATION: What pieces of work or artists were you inspired by? Post at least one example, and explain in detail what you liked about the piece? Was it the composition, the use medium, the use of colour, texture, pattern, line, etc? 3) MEDIUM: How did you prep your paper? What medium did you use? What are you using to complete your contour lines? What do you plan on using as the project progresses? Are you using any mediums that are new to you? What have you discovered? What do you hope to learn? 4) COMPOSITION: This project tends to unfold organically, but it is likely that you had a bit of plan as you created your piece. What was/is it? Describe your thoughts in these early stages. Keep in mind, your plan might change as you go. FOR AN UNDERSTANDING OF HOW YOUR REFLECTION WILL BE MARKED, SEE BELOW Hi Folks-
This weekend, you have three Pinterest related tasks: 1) Make sure your Pinterest page is linked to your blog (drag a button to your Weebly and link it to your Pinterest page) 2) Create a board focused on paper prep/ staining with at least 10 pins (marbling etc..). Make sure some of these are methods we DID NOT experiment with in class 3) Create a board with at least 20 contour line or line drawings that incorporate more than one material (at least 5 of these pins must be from outside of Pinterest). See my site and Pinterest page if you are confused. Search the web, don't stay on Pinterest. Happy Pinning! Today in class we experimented with Prismacolour pencil crayons, specifically with the purpose of adding value to our Contour Line Portraits.
Click HERE if you would like to watch the video on blending again. HERE is another source which shows you how to create value in three techniques. Homework: Tonight's homework is to finish adding value to your contour line portrait. You must choose 2-3 colours, and stick to a complementary, or analagous colour scheme. Congratulations! You've successfully found the most important page for this course!
Your first assignment is to create your website, using weebly. It's VERY user friendly, and I promise, you will have little difficulty navigating this site. For a step by step video that helps you create a weebly, click HERE. For our Art department's sanity, your URL should follow the following format: firstnamelastinitial_cwoodart_graduationyear.weebly.com for example: courtenays_cwoodart_2016.weebly.com If you are simply adding an art blog page, to a pre-existing URL just email me the link to your site: [email protected] |
Art Students...Here you will find assignments, links, and instructions for Ms. Spencer's Art 10E class. Archives
May 2018
Categories |
 RSS Feed
